

How to Create AdSense Account for Blogger In 2026: Ultimate Guide
Introduction
Starting a blog is exciting, but turning it into a source of income takes it to another level. You’ve poured your heart into creating valuable content, and now you’re ready to monetize your efforts. Google AdSense offers one of the most straightforward ways to earn money from your Blogger site, and understanding how to create AdSense account for Blogger is your first step toward generating revenue.
The beauty of combining Blogger with AdSense lies in their seamless integration. Since Google owns both platforms, they work together smoothly. However, many new bloggers feel overwhelmed by the application process. Questions about eligibility, requirements, and approval often create confusion that delays monetization.
This comprehensive guide walks you through everything you need to know about how to create AdSense account for Blogger. You’ll discover the exact requirements Google looks for, the step by step application process, common mistakes that lead to rejection, and proven strategies to increase your approval chances. Whether you’re launching your first blog or finally ready to monetize an existing one, you’ll find clear, actionable guidance here. Let’s transform your blogging passion into a revenue stream.
Understanding Google AdSense and Blogger Integration
Before diving into the creation process, understanding what AdSense is and how it works with Blogger helps you set realistic expectations. Google AdSense is an advertising program that allows website owners to display targeted ads on their content. You earn money when visitors view or click these advertisements.
Blogger, Google’s free blogging platform, integrates naturally with AdSense. This integration means you can apply for AdSense directly from your Blogger dashboard. The connection between these platforms simplifies the monetization process significantly compared to other blogging platforms.
When you display AdSense ads on your Blogger site, Google automatically matches advertisements to your content and audience. Advertisers pay Google to display their ads, and Google shares a portion of this revenue with you. The amount you earn depends on factors like your traffic volume, niche, audience location, and ad placement.
Why Choose AdSense for Your Blogger Site
AdSense offers several advantages that make it ideal for Blogger users. First, it’s completely free to join. You don’t pay anything to apply or participate in the program. Second, Google handles all advertiser relationships, payment processing, and technical aspects. You simply focus on creating content while Google manages everything else.
The platform provides reliable payments once you reach the minimum threshold. Google has been running AdSense for over two decades, establishing trust and consistency that newer ad networks can’t match. Additionally, AdSense ads are generally high quality and relevant to your content, which maintains a good user experience for your readers.
Essential Requirements Before Creating Your AdSense Account
Google has specific requirements that your blog must meet before you can successfully create an AdSense account. Understanding these requirements prevents wasted effort and rejection frustration. Let’s explore what Google expects from your Blogger site.
Content Quality and Quantity
Your blog needs substantial, original content before applying for AdSense. Google doesn’t specify an exact number of posts, but most successful applicants have at least 20 to 30 quality articles. Each post should provide genuine value to readers, typically ranging from 500 to 1500 words or more.
Content quality matters more than quantity. Google’s review team evaluates whether your content is original, well written, and useful. Copied content, thin articles with little substance, or posts that exist solely to rank for keywords will result in rejection. Your writing should demonstrate expertise and genuinely help your audience solve problems or find information.
Consistency also plays a role. A blog with 30 posts all published in one week looks suspicious. Google prefers seeing regular posting over several months, which indicates you’re serious about maintaining your site long term. This pattern suggests you’ll continue creating content and driving traffic after approval.
Age and Traffic Requirements
While Google doesn’t officially require a specific blog age, approval chances increase significantly after your blog has existed for at least three to six months. This aging period allows you to build a content library and establish posting consistency. Newer blogs can get approved, but older, established blogs face fewer scrutiny issues.
Traffic requirements are similarly unofficial but important. You don’t need massive traffic to get approved, but having regular visitors demonstrates that real people find your content valuable. Aim for at least 50 to 100 daily pageviews before applying. This traffic should come from organic search, social media, or direct visits rather than artificial sources.
Technical and Legal Requirements
Your blog must have a custom domain rather than the default Blogspot subdomain. While you can technically apply with a Blogspot address, approval rates are significantly higher with custom domains. A custom domain costs around ten to fifteen dollars annually and makes your blog look more professional.
You need to be at least 18 years old to create an AdSense account. If you’re younger, a parent or guardian must create the account on your behalf. Google requires accurate personal information during signup because they’ll send tax forms and payments to this information.
Your blog must comply with Google’s content policies. This means no prohibited content like adult material, violence, illegal activities, copyright infringement, or misleading content. Your site should also be navigable, mobile friendly, and provide clear information about your privacy policy and terms of service.
Preparing Your Blogger Site for AdSense Application
Before you actually create your AdSense account, preparing your Blogger site properly dramatically increases approval chances. These preparation steps demonstrate professionalism and commitment to quality.
Creating Essential Pages
Google expects to see certain standard pages on your blog. A comprehensive About page tells visitors and Google reviewers who you are and what your blog offers. This page should include information about your background, expertise, and the purpose of your blog.
A Contact page provides a way for readers and advertisers to reach you. Include an email address or contact form. This accessibility builds trust and shows you’re accountable for your content. A Privacy Policy page is absolutely essential for AdSense approval. This page explains how you collect and use visitor data, particularly important since AdSense uses cookies for ad targeting.
A Terms of Service or Disclaimer page protects you legally and shows professionalism. While not always required, having these pages strengthens your application. You can find free privacy policy generators online that create compliant policies specifically for AdSense publishers.
Optimizing Your Blog Design
Your blog’s appearance matters during the review process. Choose a clean, professional Blogger template that makes content easy to read. Avoid cluttered designs with too many widgets, flashing elements, or distracting features. The focus should remain on your content.
Ensure your blog is mobile responsive. Most Blogger templates automatically adjust for mobile devices, but verify this by viewing your blog on a smartphone. Google heavily emphasizes mobile experience, and a blog that looks broken on phones will likely face rejection.
Navigation should be intuitive and clear. Visitors should easily find your main content categories, about page, and contact information. A well organized menu and logical category structure demonstrate that you’ve built a real website rather than a quick money-making scheme.
Removing Problematic Elements
Before applying, remove any elements that might trigger rejection. This includes other ad networks you might be testing, affiliate links that appear overly promotional, or any content that might violate AdSense policies. While you can add these back after approval, keeping your site clean during application improves approval odds.
Check all your posts for any copyright issues. Using images without proper rights or copying content from other sites will result in immediate rejection. Replace any questionable images with properly licensed ones from free stock photo sites or your own original photos.
Step by Step Guide to Creating Your AdSense Account
Now that your blog meets all requirements, you’re ready to learn exactly how to create AdSense account for Blogger. This process involves several steps that need careful attention.
Accessing AdSense Through Blogger
Log into your Blogger dashboard using the Google account associated with your blog. From the left sidebar, click on “Earnings.” This section manages all monetization features for your blog. You’ll see an option to sign up for AdSense if you haven’t already created an account.
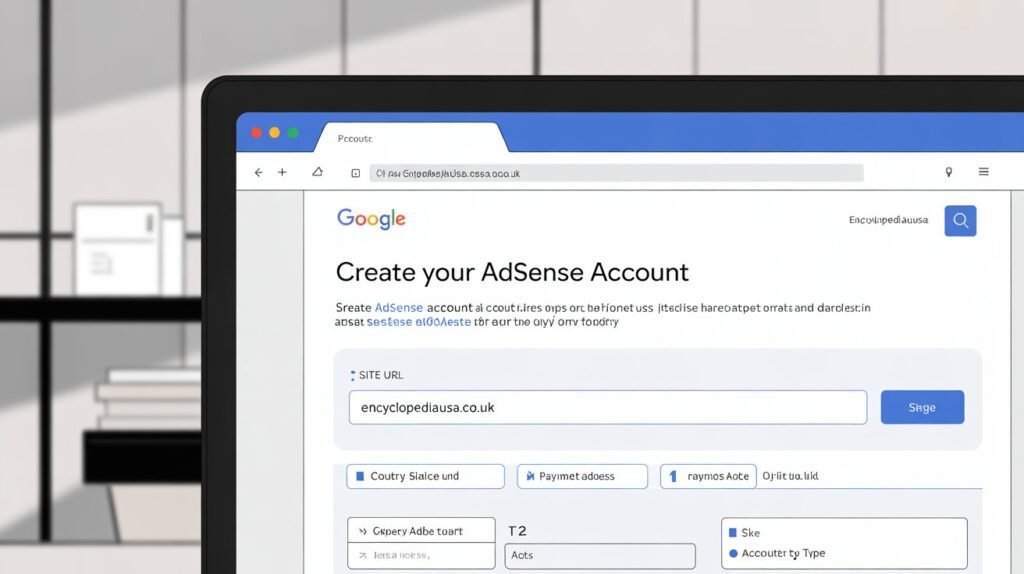
Click the “Sign up for AdSense” button. This redirects you to the AdSense application page. The system automatically detects that you’re coming from Blogger, which streamlines the application process. Your blog URL should automatically populate in the application.
If you already have an existing AdSense account from another website, you can connect it to your Blogger blog instead of creating a new account. Google allows one AdSense account per person, so you’ll use the same account across all your properties.
Completing the Application Form
The AdSense application requires accurate personal and website information. Start by selecting your country or territory. This determines payment methods, tax requirements, and sometimes eligibility, as AdSense isn’t available in all countries.
Enter your blog’s URL exactly as it appears in your browser. Don’t include the specific page path, just your main domain. For example, use yourblog.com rather than yourblog.com/about. Double check this URL because errors here can complicate your application.
Provide your email address where you want to receive important AdSense notifications. This can be the same Gmail address you use for Blogger or a different one. Google sends payment information, policy updates, and account alerts to this address, so choose one you check regularly.
Submitting Your Information
After entering your website details, you’ll move to the personal information section. Google requires your full legal name exactly as it appears on government identification. This name will appear on payment checks or bank transfers, so accuracy is crucial.
Enter your complete mailing address including street address, city, state or province, and postal code. Google uses this information for tax purposes and to verify your identity. Some countries require additional documentation like tax identification numbers.
Review all information carefully before submitting. Mistakes in your personal details can delay approval or create payment issues later. Once satisfied everything is correct, click the submit button to send your application to Google for review.
Connecting Your Site
After submitting your initial application, Google provides an AdSense code snippet. You need to place this code on your blog to verify ownership and allow Google to analyze your content. For Blogger users, this process is simplified.
Copy the AdSense code Google provides. Return to your Blogger dashboard and navigate to Theme, then Edit HTML. You’ll need to paste this code in the head section of your blog’s HTML. However, Blogger often handles this automatically when you apply through the earnings section.
Alternatively, you can use Blogger’s built in integration. In your Blogger earnings section, follow the prompts to automatically insert the AdSense code. This method is simpler and reduces the risk of coding errors. Once the code is active, Google can begin reviewing your blog.
The Review Process and What to Expect
After submitting your application and connecting your site, Google begins reviewing your blog. Understanding this process helps you manage expectations and avoid anxiety during the waiting period.
Review Timeline
Google typically reviews AdSense applications within a few days to two weeks. However, this timeline varies significantly. Some applicants receive approval within 24 hours, while others wait several weeks. Factors affecting review time include application volume, your country, and how clear cut your approval case is.
During this period, continue posting quality content regularly. Don’t make major changes to your blog’s design or structure, as this might confuse the review process. Simply maintain your normal publishing schedule and avoid anything that might violate AdSense policies.
You’ll receive email notifications about your application status. Google might request additional information or clarification about certain aspects of your blog. Respond promptly to these requests with accurate information. Delays in responding can extend the review period significantly.
Possible Outcomes
Your application can result in three possible outcomes. First, approval means you can immediately start displaying ads and earning money. Google sends a congratulations email with instructions for setting up your first ads.
Second, rejection means Google found issues with your blog that violate their policies. The rejection email typically includes reasons, though sometimes these reasons are vague. Common rejection causes include insufficient content, policy violations, or navigation issues.
Third, your application might be placed under further review. This happens when Google needs more time or information to make a decision. Continue maintaining your blog normally during extended reviews. Patience is important because rushing or repeatedly reapplying can hurt your chances.
What to Do If Your Application Gets Rejected
Rejection feels discouraging, but it’s not permanent. Many successful AdSense publishers faced initial rejection before eventual approval. Understanding how to respond to rejection improves your chances on subsequent attempts.
Understanding Rejection Reasons
Google provides rejection reasons in their email, though these explanations are sometimes generic. Common reasons include “Insufficient content,” “Content policy violations,” “Site navigation issues,” or “Valuable inventory.” Each reason requires different corrective actions.
Insufficient content means you need more posts or longer, more detailed articles. Content policy violations indicate you have prohibited material somewhere on your blog. Site navigation issues suggest visitors or Google’s crawler had difficulty moving through your site. Valuable inventory is Google’s way of saying your content doesn’t offer enough value to attract quality advertisers.
Read the rejection email carefully multiple times. Look for specific guidance about what needs improvement. If the reason seems unclear, review all AdSense program policies to identify potential issues Google didn’t explicitly mention.
Making Necessary Improvements
Address the specific issues Google identified before reapplying. If content was the problem, add 10 to 20 more substantial posts over the next month or two. Focus on creating truly helpful, original content that demonstrates expertise.
If policy violations were mentioned, carefully review every post for potential problems. Remove any prohibited content, replace improperly sourced images, and ensure all content is original. Delete old posts that don’t meet quality standards rather than leaving mediocre content on your site.
For navigation issues, simplify your blog’s structure. Create clear category menus, add a search function, and ensure all important pages are accessible within two or three clicks from your homepage. Test your blog’s functionality on different devices and browsers.
Reapplying Successfully
Wait at least two weeks after rejection before reapplying, though waiting one to two months is often better. This time allows you to make substantial improvements and demonstrates patience to Google’s review team. Reapplying too quickly with minimal changes typically results in another rejection.
When you reapply, ensure you’ve genuinely addressed the rejection reasons. Don’t just make superficial changes and hope for different results. Google’s review team sometimes consists of different reviewers, but the standards remain consistent.
Document the changes you made since rejection. While you won’t submit this information to Google, having a clear record helps you understand your improvements and avoid making the same mistakes again. Some publishers find success after three or four applications, so persistence combined with genuine improvement eventually pays off.
Setting Up Ads After AdSense Approval
Congratulations on getting approved! Now you need to set up ads on your Blogger site to start earning money. Proper ad placement balances revenue generation with user experience.
Choosing Ad Formats
AdSense offers various ad formats including display ads, in article ads, in feed ads, and matched content. Display ads are traditional rectangular advertisements that appear in your sidebar, header, or footer. These come in multiple sizes, with 300×250, 728×90, and 336×280 being most common.
In article ads appear within your post content, blending naturally with your text. These typically perform well because they’re visible as readers scroll through articles. In feed ads appear between posts on your homepage, fitting naturally into your content flow.
Matched content recommends related posts from your blog while also displaying ads. This format helps with both user engagement and monetization. For beginners, starting with display ads in your sidebar and in article ads within posts provides a good balance.
Implementing Ads in Blogger
AdSense provides code for each ad unit you create. In your Blogger dashboard, go to Layout. You’ll see different sections of your blog where you can add widgets. Click “Add a Gadget” in the location where you want an ad to appear.
Select “HTML/JavaScript” from the gadget options. Paste your AdSense code into this widget, give it a title like “Advertisement” for transparency, and save. Your ad will now appear in that location. Repeat this process for multiple ad placements.
For in article ads, edit your blog post template to include the ad code at a specific point in your content. This requires editing your theme’s HTML, which involves a bit more technical knowledge. Many Blogger users place these ads manually in individual posts or use the auto ads feature instead.
Using Auto Ads
Auto ads represent the easiest implementation method for beginners. Google’s AI automatically places ads throughout your blog in locations it determines will maximize revenue without harming user experience. You simply add one piece of code to your site, and Google handles everything else.
To enable auto ads, go to your AdSense dashboard and click on Ads, then Overview. Turn on Auto ads and select which ad formats you want to allow. Google then analyzes your blog and automatically inserts ads in optimal locations.
While convenient, auto ads give you less control over exact ad placement. Some publishers find Google places too many ads or puts them in awkward locations. You can adjust auto ads settings and exclude specific pages if needed. Many successful publishers use a combination of auto ads and manual placements.
Maximizing Your AdSense Earnings
Getting approved for AdSense is just the beginning. Maximizing your earnings requires ongoing optimization and strategy. These tactics help you generate more revenue from your blog traffic.
Increasing Your Traffic
More visitors generally means more ad impressions and clicks, which translates to higher earnings. Focus on creating SEO optimized content that ranks well in Google search. Research keywords in your niche that have decent search volume but manageable competition.
Promote your posts on social media platforms where your target audience spends time. Build an email list and notify subscribers when you publish new content. Guest post on other blogs in your niche to reach new audiences and build backlinks that improve your search rankings.
Consistency matters for traffic growth. Publishing new content regularly keeps readers returning and signals to Google that your site is active and valuable. Aim for at least one quality post per week, though more frequent publishing can accelerate growth if you maintain quality.
Optimizing Ad Placement
Ad location significantly impacts your earnings. Ads placed where users naturally look generate more clicks than ads hidden in obscure locations. The area immediately above your main content, known as “above the fold,” typically performs well.
Within your content, ads placed after the introduction or in the middle of articles get good visibility without being too intrusive. Sidebar ads work best near the top rather than below the fold. Experiment with different placements and monitor which locations generate the highest earnings.
Balance ad placement with user experience. Too many ads frustrate readers and can increase bounce rates, which ultimately hurts your traffic and earnings. Google recommends having more content than ads on each page. A good rule is no more than three ad units per page for optimal results.
Creating High Value Content
Content quality affects both traffic and ad revenue. Advertisers pay more to display ads on content about profitable topics like finance, insurance, technology, and health. If your blog naturally fits these niches, you’ll generally earn higher per click rates than blogs about lower value topics.
Long form content tends to perform better for both SEO and ad revenue. Longer articles provide more space for ad placements without overcrowding. They also tend to rank better in search results and keep readers on your page longer, increasing ad impression opportunities.
Focus on creating content that keeps readers engaged. Higher engagement signals quality to Google, which can improve your ad quality and rates. Answer questions thoroughly, provide actionable advice, and make your content more valuable than competing articles on the same topics.
Understanding AdSense Policies and Avoiding Violations
Maintaining your AdSense account requires following Google’s policies strictly. Violations can result in warnings, payment holds, or permanent account termination. Understanding these policies protects your monetization efforts.
Click Fraud and Invalid Activity
Never click your own ads or encourage others to click them. This constitutes click fraud and will get your account banned quickly. Google’s sophisticated systems detect unusual click patterns, including clicks from the same IP addresses, excessive clicks from single users, or clicking sprees that don’t match normal user behavior.
Don’t tell friends and family about your ads or ask them to support you by clicking. Don’t offer incentives for clicks or use phrases like “click here” or “support us by clicking ads.” Let ads work naturally based on genuine user interest.
Google monitors for invalid traffic sources including bots, automated systems, or incentivized traffic. Only use legitimate methods to drive traffic to your blog. Buying traffic, using traffic exchange programs, or employing other artificial traffic generation methods will trigger account reviews and likely termination.
Content Policy Compliance
Regularly review your content to ensure ongoing policy compliance. As Google updates policies, content that was previously acceptable might become prohibited. Stay informed about policy changes through AdSense announcements and emails.
Avoid controversial topics that might violate policies even if they initially seem acceptable. Gray areas include politically charged content, health claims without proper disclaimers, and anything that could be interpreted as promoting discrimination or harassment. When in doubt, err on the side of caution.
User generated content like comments requires monitoring. You’re responsible for all content on your blog, including what visitors post. Enable comment moderation and promptly remove any spam, offensive comments, or content that violates AdSense policies.
Program Policy Updates
Google periodically updates AdSense policies. You’ll receive notifications about significant changes, but you’re responsible for staying informed. Check the AdSense policy center regularly to ensure you understand current requirements.
When policies change, review your entire blog to ensure compliance with new rules. Sometimes this means removing content, changing ad placements, or updating your privacy policy. Taking immediate action when policies change prevents violations that could jeopardize your account.
Join AdSense publisher communities and forums where publishers discuss policy changes and interpretation. Learning from other publishers’ experiences helps you avoid common mistakes and understand how Google applies policies in practice.
Tracking and Understanding Your AdSense Performance
AdSense provides detailed reporting that helps you understand your earnings and optimize performance. Learning to interpret these reports is essential for maximizing revenue.
Key Metrics to Monitor
Page RPM represents revenue per thousand impressions and indicates how much you earn per thousand pageviews. This metric helps you understand your earning potential from traffic. Higher RPM means you’re generating more revenue from the same amount of traffic.
Click through rate measures what percentage of ad impressions result in clicks. Average CTR varies by niche but typically ranges from 0.5 to 2 percent. Very low CTR might indicate poor ad placement or that your content doesn’t match advertiser targeting well.
Cost per click shows the average amount you earn per ad click. CPC varies significantly based on your niche, audience location, and the specific advertisers competing for your traffic. Some niches command CPCs of several dollars, while others generate only a few cents per click.
Using AdSense Reports
The AdSense dashboard provides various reports showing earnings by date, ad unit, country, and other dimensions. Regularly review these reports to identify trends and opportunities. Notice which content generates the most revenue and create more content on similar topics.
Compare performance across different time periods to understand seasonal patterns. Some niches earn more during specific months or seasons. Understanding these patterns helps you plan content and optimize for high earning periods.
Experiment with different report views to gain insights. Look at earnings by device type to see whether mobile or desktop users generate more revenue. Review geographic reports to understand which countries drive your highest earnings. These insights inform your content and marketing strategies.
A/B Testing Ad Placements
Continuously test different ad placements and formats to find optimal configurations. Change one variable at a time so you can clearly identify what impacts performance. For example, test moving your sidebar ad higher or lower while keeping everything else constant.
Give each test sufficient time before drawing conclusions. A few days of data might not represent normal performance. Run tests for at least one to two weeks to account for daily variations. Longer tests provide more reliable results.
Document your tests and results. Keep notes about what you tried, what happened, and what you learned. This record prevents repeating unsuccessful experiments and helps you identify winning strategies you can apply across your blog.
Common Mistakes to Avoid as a New AdSense Publisher
New publishers often make preventable mistakes that hurt their earnings or violate policies. Learning from others’ experiences helps you avoid these pitfalls.
Overloading Your Blog with Ads
The temptation to maximize ad placements can backfire. Too many ads slow down your site, frustrate readers, and can trigger policy violations. Google’s policies limit ad density to maintain quality user experience. Even if you stay within policy limits, excessive ads harm your blog’s credibility.
Focus on strategic placement of a few high performing ad units rather than cluttering every available space. Quality placements in visible locations outperform numerous ads scattered throughout your site. Remember that reader experience directly impacts your traffic, which is the foundation of ad revenue.
Neglecting Mobile Optimization
Mobile traffic dominates internet usage, often representing 60 to 80 percent of blog traffic. Ads that look good on desktop might appear poorly on mobile devices. Ensure your ad sizes are responsive and adjust appropriately for smaller screens.
Test your blog and ads on various mobile devices regularly. What works on your desktop computer might create a terrible experience on smartphones. Google favors mobile friendly sites in search rankings, so mobile optimization affects both ad revenue and overall traffic.
Ignoring Content Quality After Approval
Some publishers focus intensely on quality during the application process but relax standards after approval. This approach is short sighted. Google continuously monitors publisher sites and can disable accounts that deteriorate in quality after approval.
Maintain the same content standards that earned your approval. Continue creating valuable, original content regularly. Your content quality directly impacts your traffic growth, which determines your earnings potential. The effort you put into quality content pays ongoing dividends.
Conclusion
Learning how to create AdSense account for Blogger opens the door to monetizing your passion for writing and sharing knowledge. While the application process requires patience and attention to detail, following this guide’s steps significantly increases your approval chances. Remember that success with AdSense extends beyond approval into ongoing optimization and policy compliance.
Your journey doesn’t end with account creation. Focus on building quality content, growing your traffic, and optimizing ad performance. Many bloggers start earning modest amounts and gradually increase revenue as their sites mature and traffic grows. Consistency, quality, and adherence to policies form the foundation of sustainable AdSense income.
The most successful AdSense publishers view their blogs as long term projects rather than quick money schemes. They invest time in understanding their audience, creating exceptional content, and refining their monetization strategy. With dedication and smart implementation of the strategies covered here, your Blogger site can become a reliable income source. Are you ready to take action and start your AdSense journey today?
Frequently Asked Questions
How long does it take to get AdSense approval for Blogger?
Google typically reviews AdSense applications within one to two weeks. However, approval time varies significantly based on factors like application volume, your country, and how clearly your blog meets requirements. Some applicants receive approval within 24 to 48 hours, while others wait three to four weeks. Continue publishing quality content during the waiting period and be patient with the process.
Can I use a free Blogspot domain for AdSense?
While technically possible, using a free Blogspot subdomain significantly reduces your approval chances. Google strongly prefers custom domains, which demonstrate serious commitment to your blog. Custom domains cost only ten to fifteen dollars annually and dramatically improve approval odds. Invest in a custom domain before applying for the best results.
How much traffic do I need before applying for AdSense?
Google doesn’t specify an exact traffic requirement, but having regular visitors improves approval chances. Aim for at least 50 to 100 daily pageviews before applying. This traffic demonstrates that real people find your content valuable. Focus more on content quality and quantity than achieving specific traffic numbers before your first application.
What should I do if Google doesn’t explain why they rejected my application?
Generic rejection reasons can be frustrating, but they require systematic troubleshooting. Review all AdSense program policies thoroughly and evaluate your blog objectively against each requirement. Common issues include insufficient content, thin or duplicate content, navigation problems, or subtle policy violations. Make comprehensive improvements addressing multiple potential issues before reapplying.
How many blog posts do I need before applying for AdSense?
While Google doesn’t specify an exact number, most successful applicants have 20 to 30 quality posts minimum. Focus on substantial articles of 500 to 1500 words or more that provide genuine value. Quality matters more than quantity, so 20 excellent posts are better than 50 thin articles. Space these posts over several weeks or months to demonstrate consistent publishing.
Can I have multiple AdSense accounts for different blogs?
Google allows only one AdSense account per person regardless of how many websites you own. After approval, you can add multiple websites to your single AdSense account. Never create duplicate accounts, as this violates policies and can result in all accounts being permanently banned. One account manages ads across all your properties.
How much money can I realistically earn from AdSense on Blogger?
Earnings vary dramatically based on traffic, niche, content quality, and optimization. New bloggers might earn only a few dollars monthly initially. As traffic grows, earnings can reach hundreds or thousands of dollars monthly. Factors like your topic, audience location, and ad placement significantly impact income. Focus on growing quality traffic rather than expecting immediate substantial earnings.
Do I need a business or can I apply as an individual?
You can apply for AdSense as an individual using your personal information. A business entity is not required. However, you must be at least 18 years old. If you’re younger, a parent or guardian must create the account on your behalf. Provide accurate personal information because Google sends tax documents and payments to this information.
What happens if I accidentally click my own ads?
Occasional accidental clicks typically don’t cause problems, but never intentionally click your own ads. If you accidentally click an ad, don’t panic. Google’s systems distinguish between occasional accidents and deliberate click fraud. However, patterns of clicks from your IP address raise red flags. Consider installing an ad blocking extension on browsers you use to access your own blog to prevent accidental clicks.
Can I use other ad networks alongside AdSense on Blogger?
After AdSense approval, you can generally use other ad networks alongside AdSense, but check AdSense policies and your other networks’ terms. Some ad networks prohibit mixing their ads with competitors. Ensure you don’t place too many ads total, as this harms user experience and might violate AdSense policies. During the application process, remove other ad networks to avoid complications with approval.
Also Read Encyclopediausa.co.uk
Author Bio: John Harwen
A digital marketing specialist and experienced blogger who has helped hundreds of content creators successfully monetize their blogs through AdSense and other advertising platforms. With over seven years of experience in blog monetization and a passion for teaching others how to turn their writing into income, the author provides practical, tested strategies that work in real-world applications. Committed to helping bloggers navigate the sometimes confusing world of online advertising with clear, actionable guidance.