

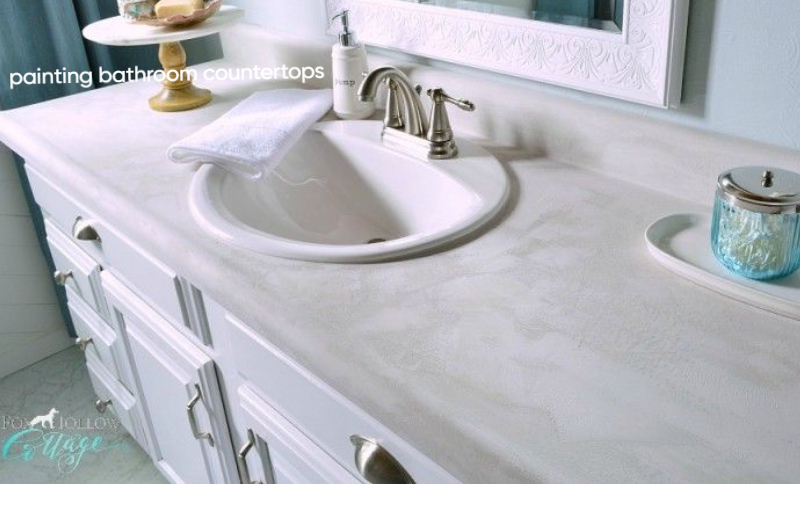
Painting Bathroom Countertops: The Complete Guide to a Fresh Look Without a Full Remodel
intoructions
If your bathroom countertop looks tired, chipped, or just plain outdated, you do not need to rip it out and start over. Painting bathroom countertops has become one of the most popular ways to refresh a space without spending thousands of dollars or waiting weeks for a renovation. You can transform a dull laminate, tile, or even cultured marble surface into something that looks brand new, all in a weekend.
In this guide, you will learn exactly how to paint your bathroom countertop the right way, what products actually work, and how to avoid the mistakes that ruin most DIY paint jobs.
Why People Choose to Paint Instead of Replace
Replacing a countertop is expensive. Between materials, labor, and plumbing adjustments, a full swap can easily cost over a thousand dollars, even for a small bathroom. Painting, on the other hand, usually costs under a hundred dollars and takes far less time.
Here is why homeowners keep choosing this option.
- It saves money compared to replacement.
- It works on laminate, tile, cultured marble, and even some solid surface countertops.
- It gives you full control over color and finish.
- It can be finished in a weekend, sometimes in a single day.
- It is a great option for rental properties or homes you plan to sell soon.
You get a countertop that looks like granite, marble, or a clean solid color, without the cost or mess of demolition.
What You Need Before You Start
You do not need a professional toolkit for this project, but having the right supplies makes a huge difference in the final result.
Materials:
- Countertop refinishing kit or epoxy paint kit
- 220 grit sandpaper
- Painter’s tape
- Plastic sheeting or drop cloths
- Degreasing cleaner
- Foam rollers and small brushes
- Clear topcoat sealer
Tools:
- Sander or sanding block
- Putty knife (for filling chips or cracks)
- Caulk gun
Most home improvement stores sell complete countertop painting kits that include primer, paint, and sealer in one box. These kits are usually your best bet, especially if this is your first time tackling a project like this.
Step by Step: How to Paint a Bathroom Countertop
1. Clear and Clean the Surface
Remove everything from the countertop, including soap dishes, toothbrush holders, and any fixtures you can safely detach. Then clean the surface thoroughly with a degreasing cleaner. Any leftover soap scum, oil, or grime will stop the paint from bonding properly, so do not skip this step.
2. Sand the Surface
Lightly sand the entire countertop with 220 grit sandpaper. You are not trying to remove the existing finish completely. You are creating a slightly rough surface so the primer has something to grip. Wipe away all dust with a damp cloth once you finish sanding.
souers;livspace.com
3. Repair Any Damage
Fill in chips, cracks, or gouges with a countertop filler or epoxy putty. Let it dry fully, then sand it smooth so it blends with the rest of the surface. Skipping repairs now means they will show through the paint later.
4. Tape Off the Area
Use painter’s tape along the sink, backsplash, and wall edges. Cover the sink itself with plastic sheeting to protect it from drips and splatter. Taking a few extra minutes here saves you a lot of cleanup later.
5. Apply Primer
Apply a bonding primer made for countertops or laminate surfaces. This step matters more than people expect. A good primer helps the paint stick and last much longer, especially in a humid bathroom environment. Let it dry completely according to the product instructions, usually a few hours.
6. Apply the Paint
Now comes the fun part. Apply your countertop paint in thin, even coats using a foam roller for large areas and a brush for edges and corners. Most kits recommend two to three coats. Let each coat dry fully before adding the next one. Rushing this step is the most common reason DIY countertop paint jobs turn out patchy or streaky.
If you want a stone or marble look, many kits include a technique for dabbing on multiple paint colors to mimic natural veining. Take your time here, since this step gives your countertop its final character.
7. Seal It With a Topcoat
Once the paint is fully dry, apply a clear epoxy or polyurethane topcoat. This is what protects your countertop from water, toothpaste, makeup, and everyday wear. Bathrooms are high moisture environments, so do not skip this step or use a cheap sealer. A quality topcoat is what separates a countertop that lasts for years from one that peels within months.
8. Let It Cure
Painted countertops need time to cure, not just dry. Curing can take anywhere from three to seven days depending on the product. Avoid placing heavy items or exposing the surface to water during this time, even if it looks dry to the touch.
How Long Does a Painted Countertop Last
When done correctly, a painted bathroom countertop can last anywhere from three to five years before it needs touch ups or a fresh coat. The lifespan depends on how well you prepped the surface, the quality of the paint and sealer you chose, and how much daily wear the countertop takes.
Bathrooms with heavy moisture, like those with young kids or frequent hot showers, may see wear sooner. Wiping up standing water and avoiding harsh abrasive cleaners will extend the life of your paint job significantly.
Common Mistakes to Avoid
Many DIY countertop paint jobs fail because of a few avoidable errors.
- Skipping the sanding step. Paint will not bond to a glossy, untouched surface.
- Using regular wall paint. It cannot handle moisture or daily contact and will peel quickly.
- Applying thick coats to save time. This causes drips, bubbles, and uneven drying.
- Not sealing properly. Without a strong topcoat, water will damage the paint within weeks.
- Rushing the cure time. Using the countertop too soon can leave permanent marks or dents.
Avoiding these mistakes is the real difference between a countertop that looks professionally done and one that needs a redo in a month.
Frequently Asked Questions
Can you paint over laminate bathroom countertops? Yes. Laminate is actually one of the easiest surfaces to paint, as long as you sand it first and use a bonding primer designed for slick surfaces.
Do you need special paint for countertops? Yes. Regular wall or furniture paint will not hold up to moisture and daily use. Look for epoxy based countertop paint or a full refinishing kit made specifically for countertops.
How much does it cost to paint a bathroom countertop? Most countertop painting kits cost between forty and one hundred dollars, covering an average sized bathroom vanity. This is significantly cheaper than replacement, which often costs several hundred to a few thousand dollars.
Is painting a countertop a good idea for resale value? It can be, especially for outdated or damaged countertops. A clean, updated look can make a bathroom feel newer to potential buyers, though a fresh paint job is not a full substitute for a real stone or quartz upgrade if buyers expect high end finishes.
How do you keep a painted countertop from chipping? Use coasters or trays under items that sit directly on the counter, avoid dragging heavy objects across the surface, and clean with soft cloths instead of abrasive scrubbers.
Final Thoughts
Painting bathroom countertops gives you an affordable, satisfying way to update your space without a full renovation. The process takes patience more than skill. If you clean thoroughly, sand properly, use the right products, and give your paint time to cure, you will end up with a countertop that looks refreshed and holds up well for years.
Take your time with each step, and you will be amazed at how much of a difference this simple project can make in your bathroom.